Tag: Cozy Game

  • Day 26 — Skybox Animation Progress & Camera Visibility Challenges

    Day 26 — Skybox Animation Progress & Camera Visibility Challenges

    Context

    Today was another deep dive into the custom skybox system. This has turned out to be one of the most technically challenging parts of the project—far more than tools, crafting, or even world generation. But progress is being made.


    Environment Rig + Level Sequence Approach

    I made meaningful progress using an Environment Rig Device paired with a Level Sequence. The idea is:

    • Animate sky gradients, horizon blends, and lighting tones inside the sequence.
    • Use Verse to map the sequence playback time to the current world time.

    This approach offers much more flexibility than relying solely on built-in sky devices.

    Seeing the sky shift based on the in-game (and real-world) clock felt like a breakthrough.

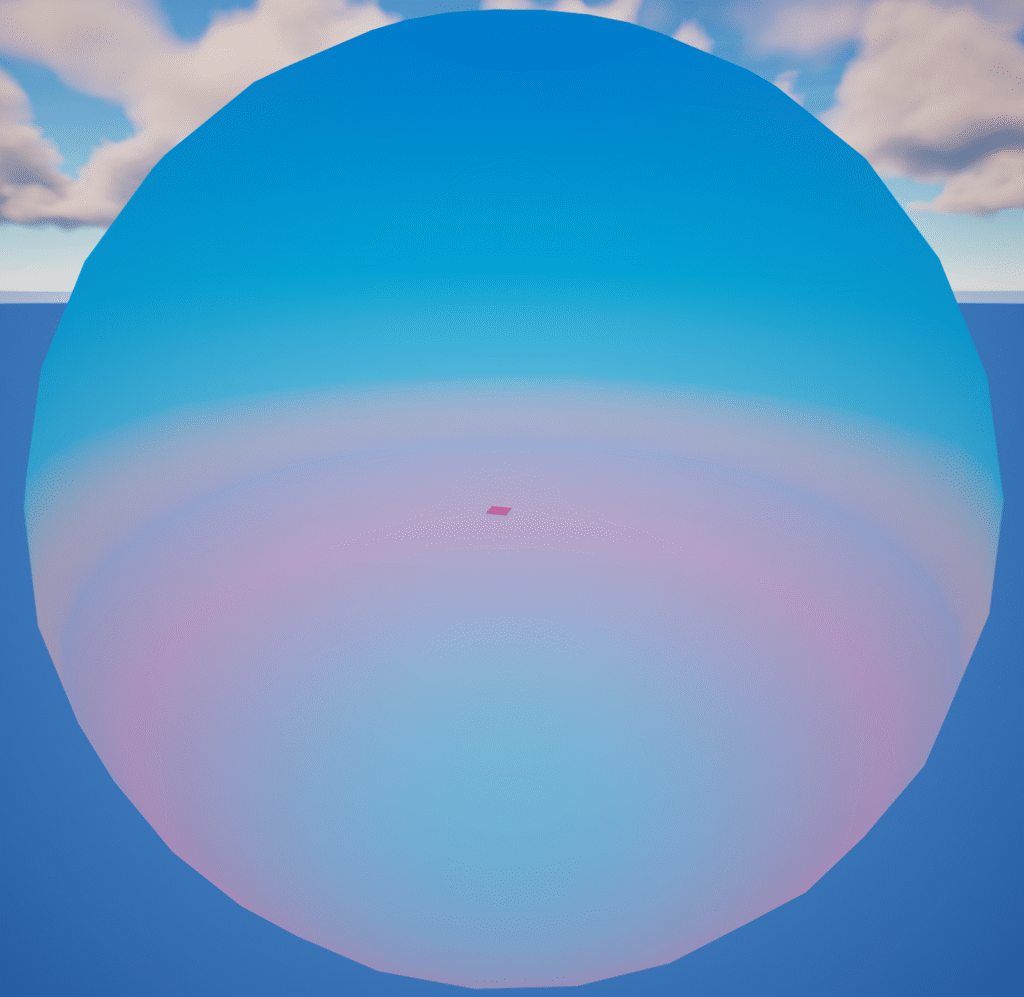
    Visual Issues: Pixelation & Harsh Shadows

    Despite the progress, I’m still wrestling with:

    • Pixelated textures at certain camera angles
    • Harsh lighting transitions or shadows appearing where they shouldn’t
    • Curved world distortion at large sphere scales

    If I can solve these, this system might become one of the most impressive visual features in the project.

    Plan B: Animating Day Sequence Devices

    Before using the Environment Rig, I experimented with animating Day Sequence Devices by:

    • Moving them around the map
    • Triggering them through volumes

    The results looked great—these devices produce high-quality sky and lighting out of the box.

    But:

    • They’re not as animatable or script-friendly
    • They make dynamic time-of-day syncing more difficult

    Still, if the custom material route becomes unsalvageable, this remains a solid fallback.

    Camera Visibility Issue: Player Occlusion Behind Trees

    I spent a couple hours trying to resolve a frustrating problem:

    • When the player moves behind trees, they sometimes become fully hidden.
    • This appears tied to a boom collision bug in the camera device.
    • Adjusting camera collision, offsets, and smoothing hasn’t fixed it yet.

    I started exploring:

    • Alternative camera setups
    • Potential occlusion shaders
    • Conditional opacity fadeouts for foliage (though this can get expensive)

    This issue is still open.


    Summary

    What I accomplished:

    • Advanced the custom skybox using an Environment Rig + Level Sequence.
    • Synced sky animation playback to real-world time via Verse.
    • Explored fallback options with Day Sequence Devices.
    • Investigated player visibility issues behind trees.

    What I learned:

    • Custom sky systems are extremely sensitive to material, lighting, and scale settings.
    • The Environment Rig offers great flexibility… but also many opportunities for visual artifacts.
    • Camera collision bugs can have a surprisingly large impact on gameplay readability.
  • Day 25 — Custom Skybox Experiments & Lighting Exploration

    Day 25 — Custom Skybox Experiments & Lighting Exploration

    Context

    Today was focused on replacing Fortnite’s default skybox with a custom solution that better supports Island Crossing’s aesthetic—and eventually, a dynamic day/night cycle tied to real-world time. This work is foundational for atmosphere, mood, and visual coherence.


    Building the Custom Sky Sphere

    I created a large sky sphere and applied a custom material to it. The immediate goal was modest:

    • Hide the flat blue plane that appears beneath the horizon when using Curved World.

    This alone makes the world feel more enclosed and believable.

    Early Experiments

    I tested several approaches for achieving a fully dynamic sky:

    • Custom shaders
    • Large textured spheres
    • Blended gradients
    • Material functions that shift color based on the time system

    Each option solved a piece of the problem but not the whole thing. The biggest challenge right now is:

    • Achieving dynamic lighting changes that respond to real-world Date/Time
    • Keeping performance acceptable on a large enclosing mesh
    • Ensuring the curved world effect doesn’t break horizon blending

    Current Status

    Nothing is final yet, but I now have:

    • A functional baseline sky sphere that conceals the default horizon issue
    • A handful of experiments that may evolve into the full system
    • A clearer understanding of engine limitations around sky/lighting in UEFN

    The long-term goal is still to match the real-time clock: morning light, sunset colors, night gradients—each reflected in the skybox and global lighting.


    Summary

    What I accomplished:

    • Built a custom sky sphere to replace the default horizon.
    • Implemented a temporary material to address visual seams.
    • Explored multiple approaches to dynamic sky and lighting.

    What I learned:

    • Custom skyboxes are more complex under Curved World constraints.
    • Dynamic lighting in UEFN is limited and requires creative workarounds.
    • Even partial progress (hiding the default horizon) significantly improves world presentation.
  • Day 24 — New Trees, Multi‑Tile Items, and World Environment Expansion

    Day 24 — New Trees, Multi‑Tile Items, and World Environment Expansion

    Context

    Today marked a shift from purely mechanical systems to more visual and environmental work. With core gameplay loops stabilizing, I spent the day improving the look and feel of the island and expanding support for more complex world objects.


    Replacing Trees with Purchased Assets

    I swapped out all placeholder trees with the newly purchased, higher‑quality models. This significantly improves the overall aesthetic, especially since trees are one of the most visible elements on the island.

    The new meshes also required:

    • Adjusting pivot points
    • Tweaking collision profiles
    • Re‑testing harvesting interactions

    Everything now integrates cleanly with the existing axe + resource drop loops.

    Multi‑Tile Item Support (Crafting Station)

    I imported the new mesh for the Crafting Station, which introduced a new requirement: supporting items that occupy more than one tile.

    To accommodate this, I refactored:

    • Tile occupancy rules
    • Drop placement validation
    • Persistence logic for world objects

    The crafting station now correctly occupies two tiles, preventing conflicts and ensuring proper placement.

    Expanding the World Beyond the Grid

    For the first time, I began building the environment outside the core 50%‑sized island grid.

    This required several steps in Blender before importing into UEFN:

    • Creating a rectangular ring around the grid for sand
    • Building a larger surrounding mesh for ocean water
    • Ensuring both meshes subdivide correctly for Curved World compatibility

    After importing:

    • Applied the curated water material
    • Adjusted normals and smoothing
    • Verified curvature alignment with the central island

    The result is a much more complete visual presentation of the island, rather than having it float awkwardly in an empty void.


    Summary

    What I accomplished:

    • Replaced placeholder trees with purchased assets.
    • Added full support for multi‑tile world objects (crafting station).
    • Built the sand border and water environment around the grid.
    • Imported and integrated new Blender meshes with Curved World support.

    What I learned:

    • Multi‑tile items introduce meaningful complexity to placement rules.
    • Environmental meshes require careful subdivision to work with curved worlds.
    • Even simple environmental framing dramatically improves the feel of the world.
  • Day 23 — Resource Drop Animations, Project Cleanup & Texture Budgeting

    Day 23 — Resource Drop Animations, Project Cleanup & Texture Budgeting

    Context

    Today centered on two major efforts: improving the clarity and satisfaction of resource gathering and beginning the long-term optimization pass needed to keep the project within Fortnite’s memory constraints. With more assets being added, this kind of cleanup and budgeting work becomes increasingly important.


    Resource Drop Animations

    I added custom animations and behaviors for Stone and Wood resources. Now, when the player strikes a rock or tree:

    • The resource visually drops from the object
    • It lands on the tile beneath it
    • Pickup behavior aligns with the existing resource loop

    This small addition goes a long way toward making harvesting feel grounded. Rather than resources abruptly appearing in the inventory, they now have a physical presence in the world before being collected.

    Project Cleanup & Organization

    I spent a significant portion of the day cleaning and organizing the project. This included:

    • Removing unused assets
    • Standardizing folder structure
    • Consolidating material instances
    • Reviewing mesh imports for consistency

    As the project grows, this kind of maintenance work prevents chaos later and ensures assets remain easy to track and modify.

    Texture Compression & New Asset Imports

    With the recent wave of purchased assets, I began the process of:

    • Importing each mesh into the project
    • Compressing all textures to appropriate formats
    • Evaluating texture resolutions vs. quality
    • Assessing how much each asset set contributes to project size

    The project is currently sitting around 12% memory usage. With all incoming assets, I’m aiming to stay under 15%, which should preserve plenty of headroom for future features, VFX, UI, audio, and polish.

    This might require additional optimization passes, but the early numbers seem workable.


    Summary

    What I accomplished:

    • Added falling resource animations for Stone and Wood.
    • Cleaned and reorganized major portions of the project.
    • Began importing and compressing newly purchased assets.
    • Assessed early memory budget with a goal of staying under 15%.

    What I learned:

    • Visualizing resource drops adds clarity and weight to gathering mechanics.
    • Regular cleanup prevents technical debt from accumulating.
    • Texture compression plays a huge role in keeping memory budgets healthy.
    • Handling asset optimization early reduces surprises later in development.
  • Day 22 — Watering Can VFX, Tool Feedback, and Plant Interaction Effects

    Day 22 — Watering Can VFX, Tool Feedback, and Plant Interaction Effects

    Context

    Today was all about adding visual feedback to core interactions. While the underlying systems for tools and farming have been functional for a while, the moment-to-moment experience still felt flat. The goal was to bring life and clarity to actions through VFX and polish passes.


    Watering Can Integration

    I finished bringing the watering can fully into the game. This included:

    • Applying its final material
    • Confirming the mesh aligns correctly with the animation system
    • Integrating it into the tool-handling and item pipeline

    With this, all core farming tools now exist in their basic functional form.

    Tool VFX

    To give each interaction more impact, I added VFX for every major tool:

    • Grass Cutting: Grass now sprays upward when cut instead of simply disappearing.
    • Watering: Added a light spray effect beneath the watering can.
    • Digging & Filling: Added particles, though I’m still not satisfied with how this looks. I may revisit it later.
    • Pickaxe on Rocks: Added impact sparks and debris bursts to sell the force of the hit.
    • Axe on Trees: Added bark-and-wood chip particles that match the feel of chopping.

    These effects help actions read more clearly and make the world feel more reactive. help actions read more clearly and make the world feel more reactive.

    Plant Watering Loop (Inspired by Animal Crossing)

    I added a subtle looping effect for plants when they’re freshly watered. It’s a small, ambient animation/VFX cue, but it goes a long way toward making plants feel alive—very similar to the visual language used in Animal Crossing.

    Next Steps

    • Revisit digging/filling VFX once more assets or references become available.
    • Begin polishing the placement preview visuals.
    • Add tile-based effects for the other farming stages.

    Summary

    What I accomplished:

    • Fully integrated the watering can.
    • Added VFX for grass cutting, watering, and hole interactions.
    • Implemented a watered-plant loop inspired by Animal Crossing.

    What I learned:

    • Even simple VFX dramatically improve interaction clarity.
    • Farming tools benefit from strong visual language to reinforce player feedback.
    • Some effects (like digging) need iteration and reference material to get right.
  • Day 21 — Animation Refinement & Additional Mesh Integration

    Day 21 — Animation Refinement & Additional Mesh Integration

    Context

    With the foundational animation pipeline in place, today focused on refining the animations themselves and integrating the remaining meshes needed to support core farming and gathering behaviors. This was a polish-heavy day with a mix of creative adjustments and technical troubleshooting.


    Animation Overhaul

    Although all animations were functional, they still felt a bit slow and lacked the responsiveness I wanted for moment-to-moment interactions. I spent a significant portion of the day:

    • Re-making each animation sequence
    • Increasing speed and smoothing transitions
    • Ensuring poses aligned well with tools
    • Testing each animation inside the seat-device workflow

    The results feel noticeably better—more readable, more responsive, and tonally closer to a cozy life-sim.

    New Mesh Integration

    I added the remaining meshes for:

    • The scythe/grass cutter
    • The watering can

    These are now supported in the animation flow, though the watering can still needs:

    • A proper material
    • VFX for water flow or sprinkling

    That will come during the polish phase.

    Troubleshooting & Regression Fixes

    Half the day went toward tracking down an issue where the player would bounce upward as soon as an animation ended. This turned out to be a regression caused by how the character was exiting the seat-device state. After refining the exit timing and adjusting root motion behavior, the issue was resolved.

    Next Steps

    With animations complete, I’ll be moving on to:

    • Polishing placement preview visuals
    • Adding tile-based VFX for actions like watering, digging, and cutting

    Summary

    What I accomplished:

    • Rebuilt all animations for better speed and smoothness.
    • Integrated the scythe and watering can meshes.
    • Fixed a regression causing the player to bounce after animations.
    • Prepared the system for upcoming polish work.

    What I learned:

    • Animation feel depends heavily on timing and responsiveness.
    • Even small regressions in animation exit logic can create noticeable UX issues.
    • Having a stable animation set makes visual polish much easier to approach.
  • Day 20 — Integrating Purchased Animations & Meshes

    Day 20 — Integrating Purchased Animations & Meshes

    Context

    Today was focused on importing newly purchased animations and meshes and getting them integrated into the workflow I established yesterday. This was mostly pipeline work rather than gameplay systems, but it’s critical for achieving the level of polish I want in character expression and tool interactions.


    Asset Pipeline Work

    The process required several steps:

    1. Importing assets into Unreal Engine first (since some marketplace assets are not UEFN-ready by default).
    2. Migrating them into UEFN, ensuring all dependencies came over cleanly.
    3. Creating new Animation Sequences inside UEFN based on the purchased animations.

    The work was fairly tedious and required researching how to properly adapt external animation files so they align with Fortnite’s skeleton and UEFN constraints.

    Early Setup

    All major animation sequences are now created, though not yet refined. I was able to:

    • Preview the animations on the character
    • Verify compatibility with yesterday’s seat_device animation system
    • Begin rough integration into the interaction flow

    Outstanding Tasks

    There’s still polish work needed:

    • Smoothing transitions between animations
    • Adjusting poses for better readability
    • Finding or generating additional meshes to match the new animations

    Summary

    What I accomplished:

    • Imported purchased meshes and animations into Unreal Engine.
    • Migrated assets into UEFN.
    • Created new Animation Sequences for all incoming animations.
    • Completed the initial setup for animation integration.

    What I learned:

    • Marketplace animations require several adaptation steps before becoming usable in UEFN.
    • Even with a functional animation system, polish requires iteration.
    • Having high‑quality animations dramatically improves UX, but they demand a strong pipeline to support them.
  • Day 19 — Custom Character Animations via Seat Device

    Day 19 — Custom Character Animations via Seat Device

    Context

    Today I explored a workaround for adding custom animations to the player character. UEFN still has limitations around fully custom animation graphs, so I experimented with a non‑standard approach using the seat_device to force pose and animation changes.

    The approach is unconventional and required a lot of iteration, but the results were surprisingly fluid once tuned.


    Custom Animation Implementation

    The core idea was to:

    • Attach invisible seat devices to specific world states or interactions.
    • Snap the player into the seat with a custom pose.
    • Blend this into gameplay to simulate unique animations.

    Despite being a workaround, it created the UX I was aiming for—more personality and clarity in the player’s actions.

    Challenges & Trade‑offs

    This method is not scalable on its own:

    • It requires many devices for different animation states.
    • Setup is more manual than a true animation graph.
    • Debugging takes longer because animation transitions depend on device logic.

    Still, the trade-off felt acceptable because animation quality has a major impact on player perception, especially in a cozy life‑sim where expressiveness matters.

    Next Steps

    • Replace placeholder meshes with higher‑quality versions.
    • Source or create better animations to integrate into the system.
    • Build a consistent workflow to manage the growing number of seat devices.

    Summary

    What I accomplished:

    • Implemented a functional custom animation system using seat devices.
    • Achieved fluid transitions despite engine limitations.
    • Established a path to more expressive player actions.

    What I learned:

    • Sometimes the best solution is a hack that reliably delivers the desired UX.
    • Animation polish dramatically improves overall game feel.
    • Even non‑scalable systems can be worthwhile when used intentionally.

  • Bringing Cozy Games to Fortnite – Day 18

    Bringing Cozy Games to Fortnite – Day 18

    Day 18 — Crafting Completion, Destructible Tools & Blueprint Items

    Context

    Today was about closing the loop on the Crafting system. After several days of setup—UI structure, backend logic, interaction systems, and input refactors—the goal was to bring everything together into a fully functional feature. With the updates made today, the entire crafting pipeline is now complete.

    Scrollable Blueprint UI

    I finished implementing the scrollable UI for blueprints inside the Crafting Station. Players can now:

    • Navigate through larger recipe lists
    • Scroll smoothly between rows
    • Access any available blueprint regardless of its position

    This removes the earlier limit where only 12 recipes were visible, making the UI scalable for future content.

    Destructible Tool Properties

    I added destructible properties for tools. Tools now:

    • Have durability
    • Can break after repeated use
    • Must be re-crafted or replaced when worn out

    This adds a natural resource sink and strengthens the gathering → crafting → usage loop.

    Blueprint Items & UI Integration

    Blueprints now behave like full game objects:

    • They have their own mesh and icon
    • They can be dropped on tiles
    • They can be picked up like any other item
    • They can be “learned,” unlocking the associated recipe in the Crafting Station
    • They function in inventory, persistence, and UI

    This establishes a flexible system for teaching players new recipes over time.

    System Summary

    With these updates, the crafting system now supports:

    • Blueprint acquisition
    • Unlocking new recipes
    • Crafting items from resources
    • Breaking tools and re-crafting replacements
    • A scalable UI for large recipe libraries

    This completes all major crafting functionality.


    Summary

    What I accomplished:

    • Finished scrollable UI for blueprint navigation.
    • Added destructible properties to tools.
    • Implemented full Blueprint item behavior (drop, pickup, learn).
    • Completed the core crafting gameplay loop end-to-end.

    What I learned:

    • Crafting becomes far more dynamic once recipes can be earned through gameplay.
    • Durability adds meaningful structure to the game’s economy.
    • UI scalability is essential when systems are expected to grow.
  • Bringing Cozy Games to Fortnite – Day 17

    Bringing Cozy Games to Fortnite – Day 17

    Day 17 — Crafting Mechanics & Input Refactors

    Context

    With the Crafting UI and backend structure in place, today was about testing the actual mechanics: how players interact with a crafting station, how recipes behave, and how the system responds to available materials. This was the first time all the pieces started coming together in a playable form.

    Crafting Station Interaction

    Players can now:

    • Place (drop) a Crafting Station in the world.
    • Walk up and interact with it to open the Crafting UI.
    • Navigate recipe slots to see material requirements.
    • Craft an item when they have the necessary resources.

    The station itself behaves consistently with other item‑based objects in the game—fully supporting Drop and Pickup behavior.

    UI Integration & Feedback

    The UI is functional but unpolished. Still, it includes:

    • Slot navigation using the consolidated input device.
    • A clear indication of whether materials are available.
    • Subtle feedback animations when crafting succeeds (or fails).

    Scrollable slots are partially implemented—you can see up to 12 recipes, but scrolling logic still needs work.

    Input System Refactor

    While building the crafting flow, I had to untangle and reorganize input logic:

    1. Fixed an item‑quantity bug where Drop One vs. Drop All behaved inconsistently.
    2. Consolidated all UI inputs into a single UI device.
    3. Consolidated all world inputs into a single world‑input device.

    This simplifies long‑term maintenance and prevents input conflicts between systems.

    Next Steps

    • Implement scrolling for larger recipe lists.
    • Add destructible properties to tools.
    • Polish UI states and transitions.

    Summary

    What I accomplished:

    • Made crafting stations fully interactive.
    • Implemented the basic crafting flow with material validation.
    • Added subtle UI feedback animations.
    • Refactored input handling into unified devices.
    • Fixed Drop One vs. Drop All behavior.

    What I learned:

    • Crafting ties together more systems than expected—UI, items, world input, inventory, and persistence.
    • Unified input management reduces future complexity.
    • Early UI feedback, even rough, makes feature testing noticeably easier.